

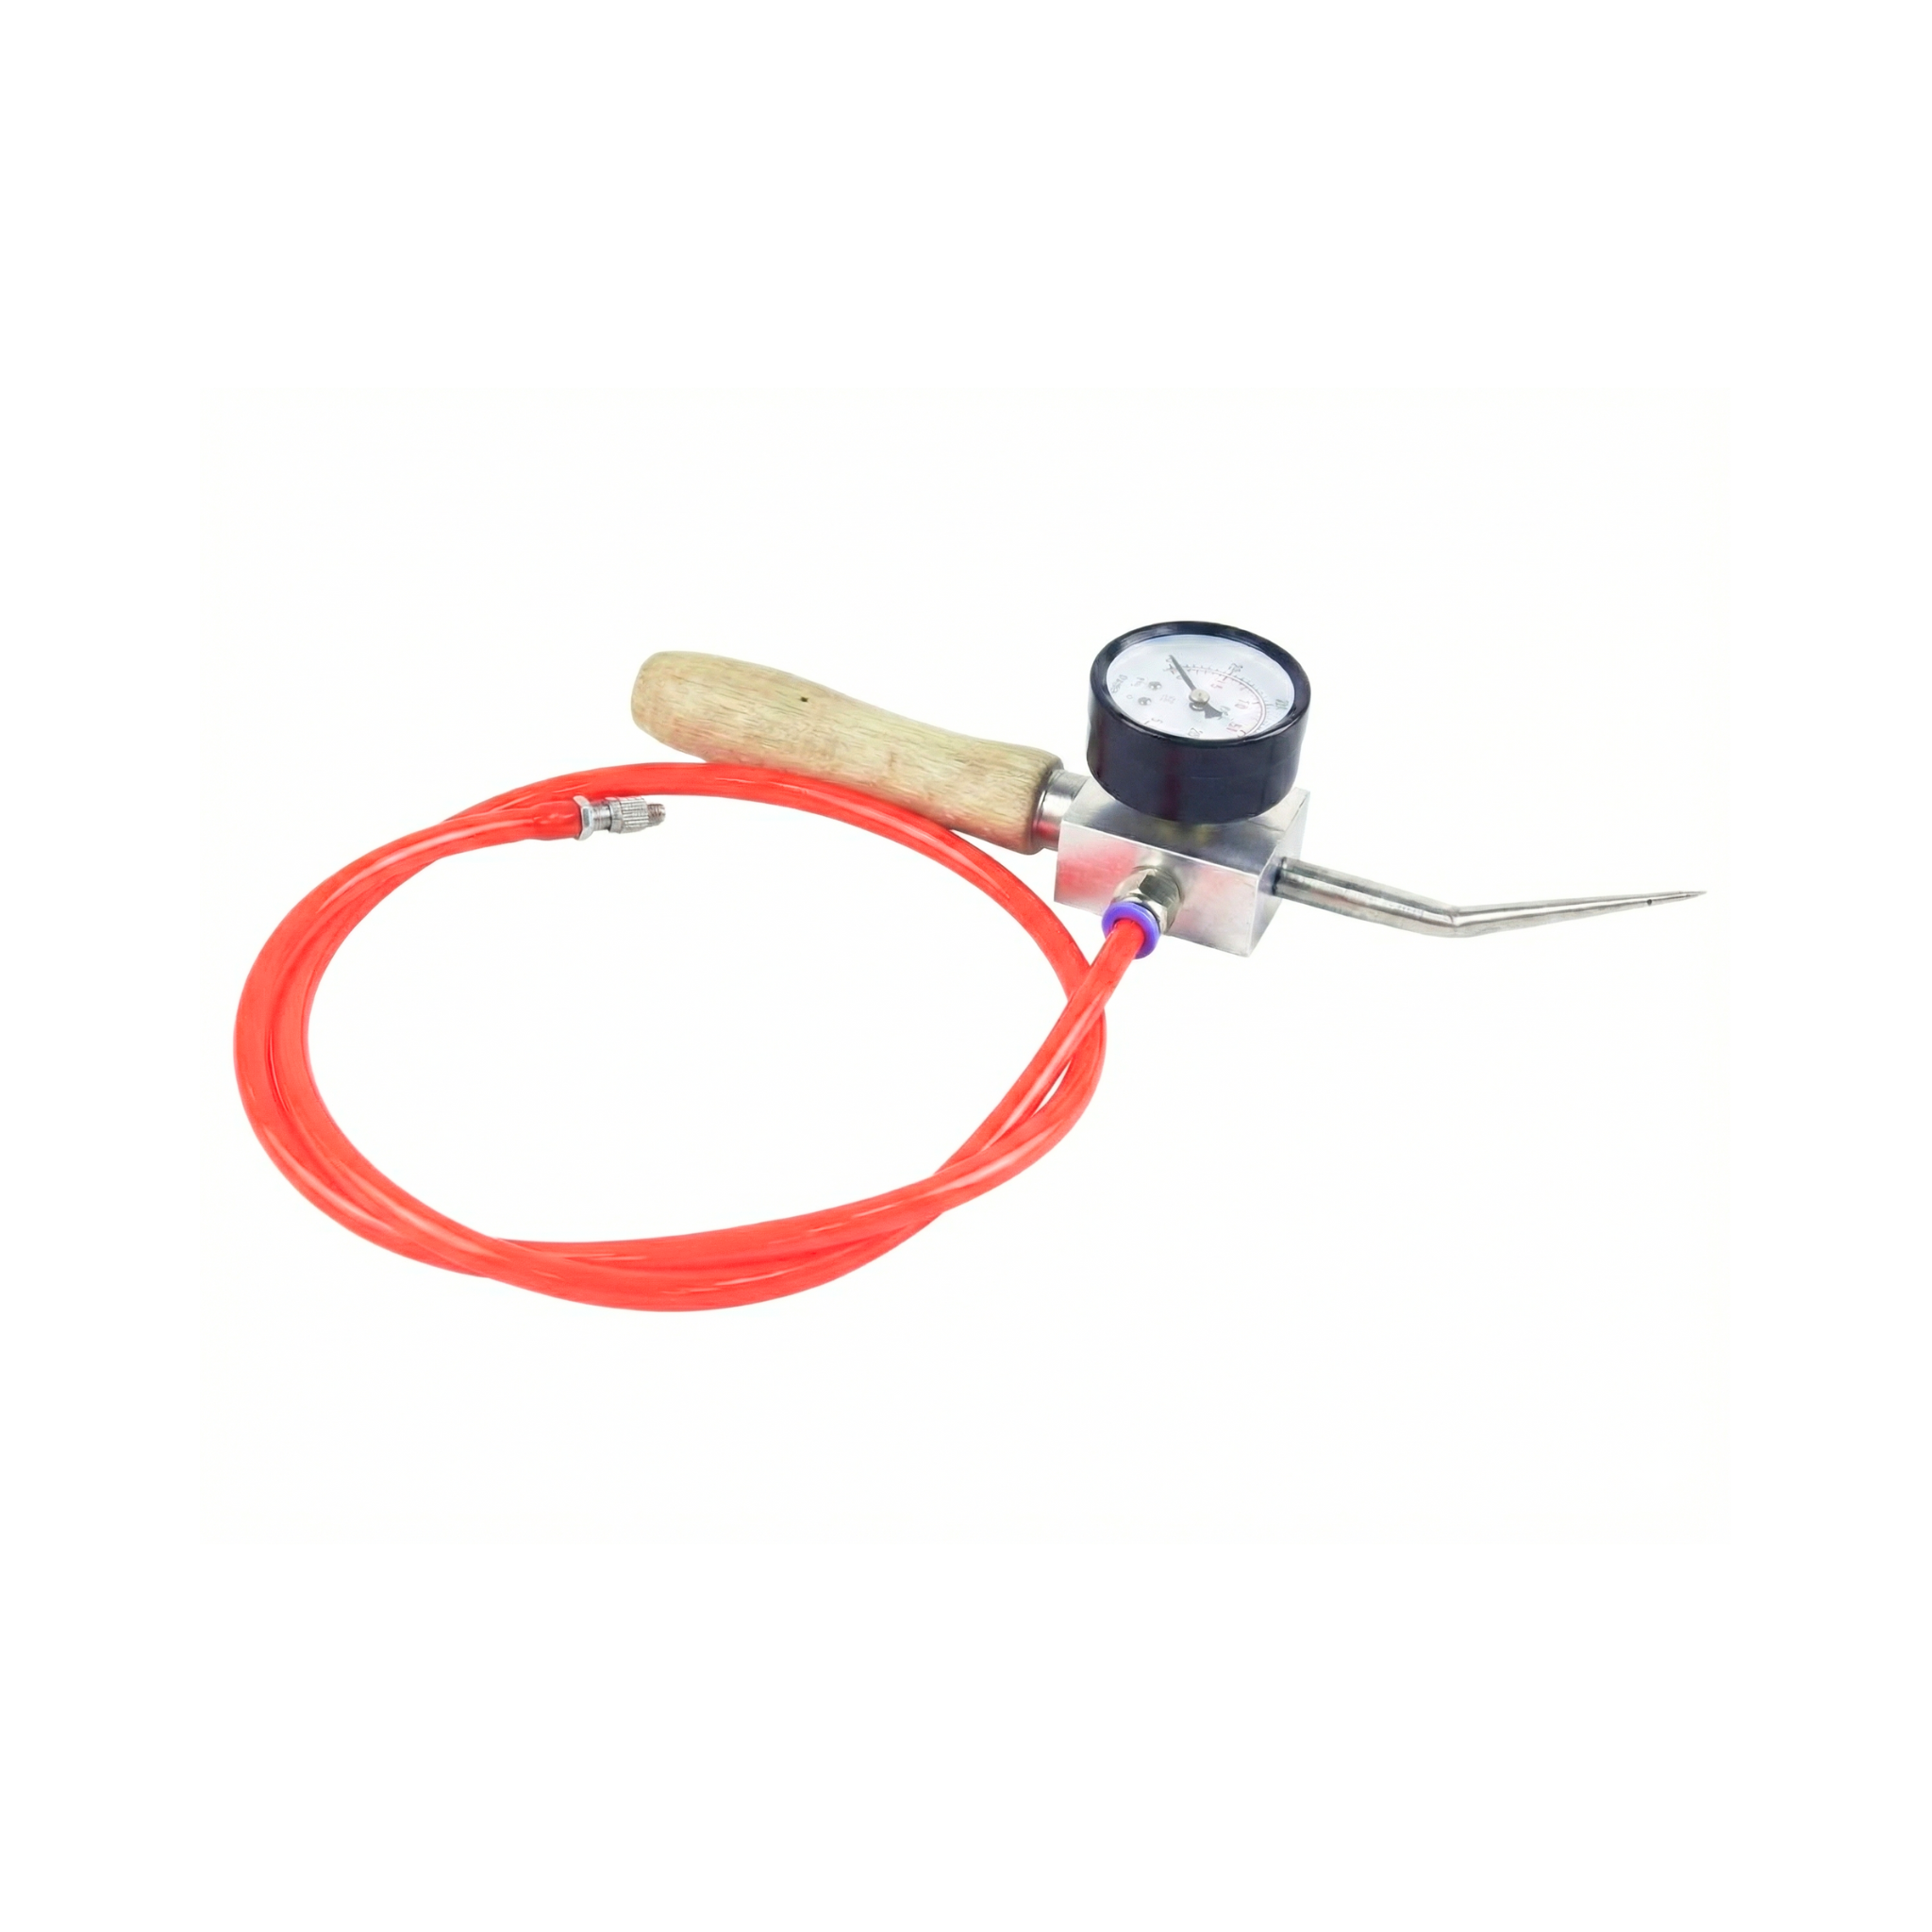
This guide covers pressure testing with a needle gauge on hot-wedge welds: wait for the joint to cool, seal one end of the channel, insert the needle into the open end, inject air at test pressure, wait 5 minutes with a reading and documentation. Follow these steps to verify that the weld's air channel is airtight and the joint meets the project specification.
Product specifications
The needle gauge is a mechanical pressure-measuring instrument, fitted with a hollow-tipped needle through which air is injected into the channel between the two weld beads of a hot-wedge weld. The operator injects air up to the test pressure, waits the standard time and observes the drop. It is the definitive tool for auditing the condition of the joints.
| Specification | Standard gauge |
|---|---|
| SKU | 126342 |
| Measuring range | 0 – 60 psi (0 – 4 bar) |
| Type | Mechanical, analog dial |
| Application | Air-channel testing on hot wedge |
Step-by-step guide to using it
Pressure testing of the channel between beads is the benchmark quality control for hot-wedge welds. The inspection protocol usually requires an initial pressure of 30 psi (2 bar) and a maximum drop of 10% over 5 minutes. Follow the strict order.
Wait for the joint to cool
Do not run the test on a hot weld. Wait at least 15 minutes after the hot wedge has passed so that the joint has cooled and consolidated. A hot weld gives erroneous readings because the air inside expands.
Seal one end of the channel
Using an extrusion welder or the hot-air welder itself, close one of the two ends of the air channel between the two weld beads. Check by hand that this end is airtight before proceeding.
Insert the needle into the open end
Pierce the side membrane of the air channel with the gauge needle at the end opposite the sealed one. The needle goes in perpendicular, passing through only the upper sheet. The tip must end up inside the channel without touching the lower sheet.
Inject air at test pressure
Connect the pump or compressor to the gauge valve and raise the pressure to 30 psi (2.0 bar) or whatever your protocol indicates. Close the valve. Wait 1 minute for stabilization: the system drops to equilibrium pressure once all the air has expanded uniformly. Note the initial pressure.
Wait 5 minutes and read
Time exactly 5 minutes. At the end, read the pressure. The loss must not exceed 10% of the initial pressure. For example, starting from 30 psi, the final reading must be ≥27 psi. If it drops more, there is a leak: the joint must be repaired with an extruder before continuing the work.
Document the result
Take a photo of the display at the start and at the end of the test. Record in your site logbook: identification of the run (number or coordinates), initial pressure, final pressure, drop in %, date and time. That traceability is the final quality guarantee of the work.
On a site in full sun with the ambient temperature changing rapidly, the channel pressure rises and falls due to expansion of the air inside. If you are unsure whether the drop is from a real leak or from cooling (for example if a cloud blocked the sun), repeat the test 30 minutes later. A sound joint always gives a correct result again under stable thermal conditions.
Do not inflate the channel above the test pressure thinking it improves the check. Inflating to 50 or 60 psi can break a sound joint, especially in thin sheets. The recommended pressure of 25-30 psi (1.7-2.0 bar) is calculated to detect real leaks without damaging the material. Follow the protocol.
Complementary products
The needle gauge is the control tool for hot-wedge welds. It is part of the inspection kit alongside the materials and machines it verifies.
The hot-wedge welding machine is the only one that produces the air channel that the gauge verifies. The HDPE geomembrane is the base material of the joint. The extrusion welding machine is the repair tool: when the gauge detects a leak, the extruder corrects it.
Maintenance and care
The gauge is a delicate tool that loses calibration with knocks:
- Pouch and case: always transport it in its original pouch or in a padded compartment. A knock to the dial throws off the reading.
- Calibration check: every 6 months, compare against a reference gauge or take it to a metrology laboratory. Note the last check in your logbook.
- Replaceable needle: the needle wears out or bends. Replace it when you notice it leaks air around the puncture area or struggles to penetrate the sheet.
- Valves and connections: before each shift, check that the check valve does not leak. A valve with an internal leak invalidates the test.
- Storage: keep it in a dry place at a stable temperature. Avoid the truck box under the Caribbean sun, where internal temperatures exceed 60 °C.
Frequently asked questions
How much pressure should I use, and why for how long?
The most widespread protocol on site is 25-30 psi (1.7-2.0 bar) for 5 minutes with a maximum drop of 10%. Some public works require 30 psi for 10 minutes. Check your construction contract specifications. Higher pressures or longer times are not always stricter: they can damage valid joints and give false negatives.
My pressure drops slowly, is there a leak?
If the drop is less than 10% over 5 minutes, the joint is valid. If it is between 10% and 30%, repeat the test 30 minutes later to rule out a thermal effect (change in ambient temperature). If the drop persists, there is a micro-leak: the joint must be repaired. If the drop is over 50% or a total loss, there is a major leak: locate it and repair with an extruder.
Can I use this gauge for other tests?
Yes, it works for any pressure check in the 0-60 psi range: pressure testing of plastic pipes, forklift and machinery tires, drip irrigation systems. For greater precision at low pressure there are gauges with a 0-15 psi scale. For high pressure, there are models up to 200 bar. This is the optimal range for a weld channel.
