You have just purchased a hot wedge welding machine, the main tool for welding geomembranes on large construction sites: ponds, landfills, lagoons, and waterproofing works. Its great advantage is that it produces a double seam with an intermediate test channel, allowing verification of the integrity of each joint with a pressure gauge and compressed air. In this guide, we explain how to operate it.
Product specifications
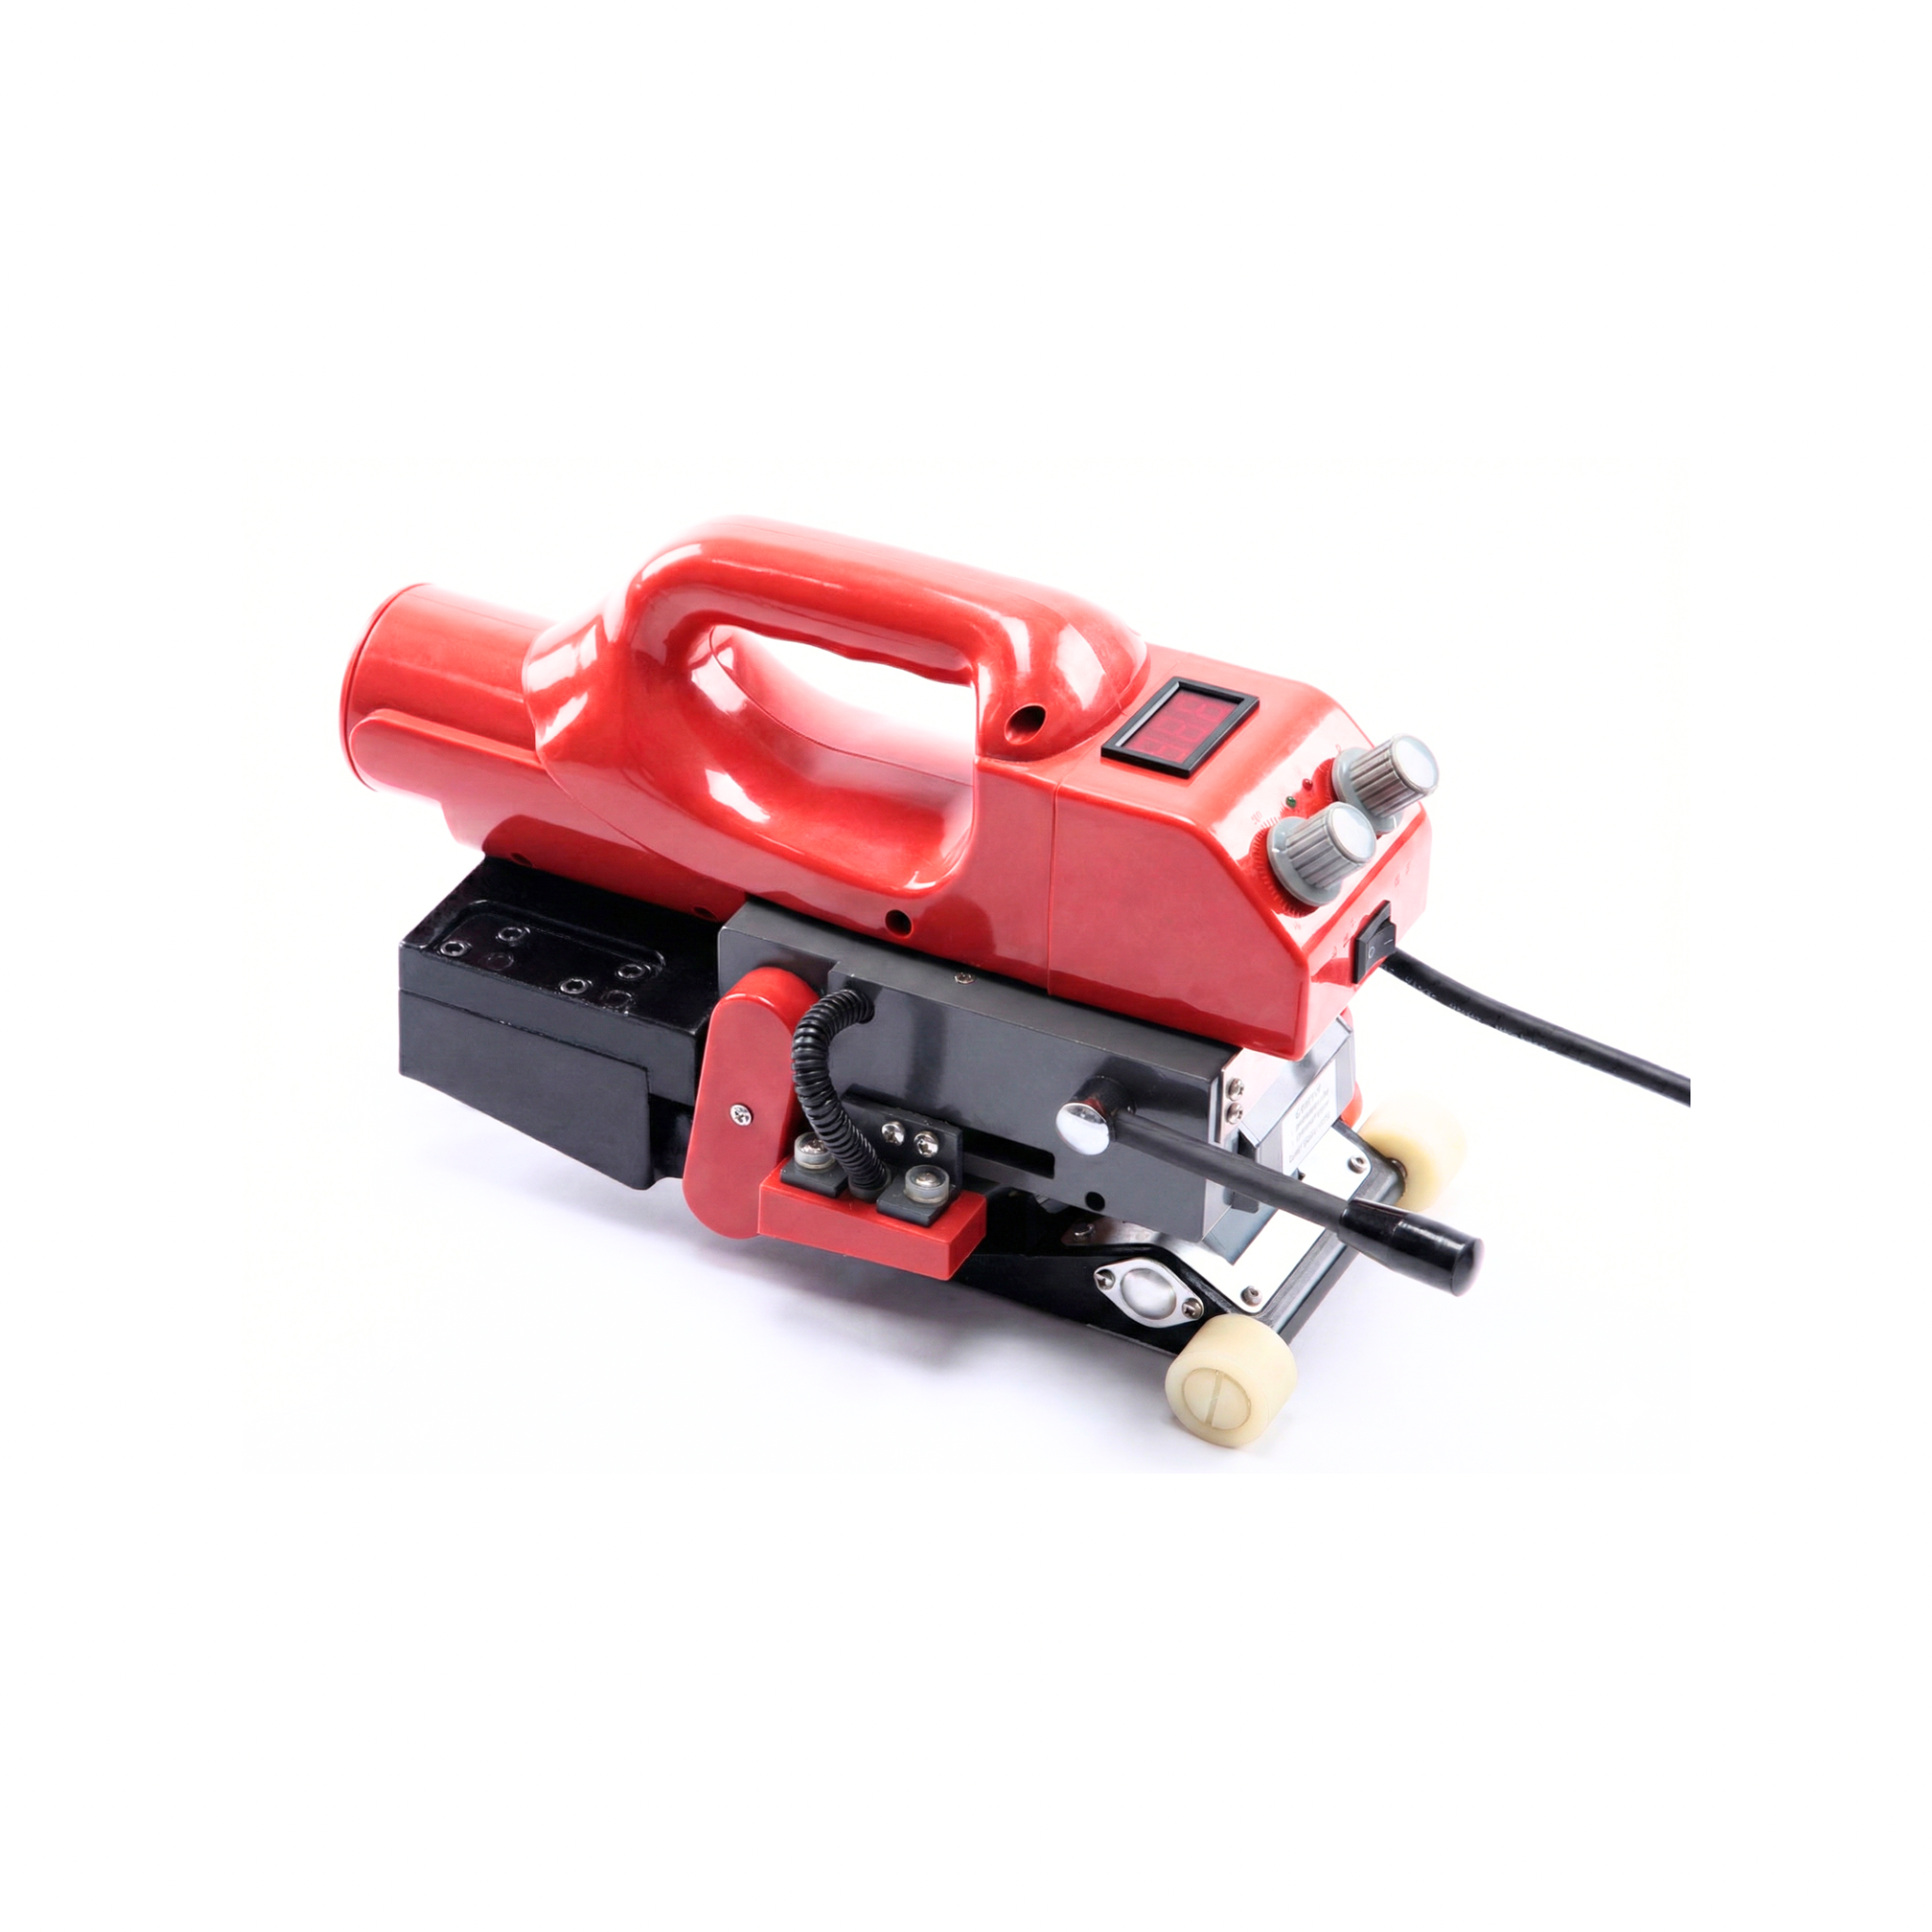
The hot wedge automatically moves over the overlap between two sheets. A heated metal wedge in the center simultaneously melts the facing surfaces, and two motorized rollers press them together, creating two parallel beads with an air channel between them. We offer two variants: 800 W for short runs and thin sheets, and 1800 W for large areas and heavy geomembranes.
| Specification | 800 W Wedge | 1800 W Wedge |
|---|---|---|
| SKU | 983422 | 232412 |
| Power | 800 W | 1800 W |
| Voltage | 220 V | 220 V |
| Welding type | Double bead with channel | Double bead with channel |
| Recommended thickness | 0.5 – 1.0 mm | 1.0 – 2.5 mm |
| Application | Small and medium-sized works | Large works (ponds, landfills) |
Step-by-step guide
The hot wedge is an automatic machine: once calibrated and started, it moves independently over the overlap. Its great advantage is the reproducibility of the joint. Its requirement: calibrate well at the start of the day and keep the rollers clean.
Overlap and align the sheets
Overlap the two sheets to be joined by 12 to 15 cm (5 to 6 in). Vacuum or blow to remove dust from the overlap area. The hot wedge does not tolerate contamination: if sand gets between the rollers, the joint will be scratched and rendered unusable.
Heat the machine and adjust speed
Connect and adjust temperature: 380-420 °C (716-788 °F) for standard HDPE. Advance speed between 1.5 and 2.5 m/min (5 to 8 ft/min) depending on thickness. Wait 5 minutes for stabilization. The machine must reach operating temperature before starting to weld the actual work.
The 800 W variant operates at lower ranges (350-380 °C) and slower speeds (1.0-1.5 m/min). The 1800 W variant maintains twice the power, allowing for higher speeds without losing temperature: 2.0-2.5 m/min with thick sheets. Always calibrate with a test strip; published values are indicative.
Test strip and destructive test
Weld a 1-meter (3.3 ft) test strip from scraps of the same material. Wait for it to cool and perform a T-peel test and a shear test. Both beads should fail in the base material, not at the joint. If it peels, increase the temperature by 10 °C or reduce the speed. Note the parameters that worked on the machine or in your site logbook.
Start welding on site
Position the machine at the start of the overlap, insert the wedge between the two sheets, and start the feed. The machine will move on its own, following the overlap line. Accompany it, ensuring the sheets enter straight, without folds. Stop the advance at any irregularity.
Air channel pressure test
Once the joint is cool (15 minutes), seal one end of the channel between the two beads and inject air through the other end at 25-30 psi (1.7-2.0 bar) with a needle pressure gauge. Hold for 5 minutes: the pressure should not drop more than 10%. If it drops more, there is a leak: locate and weld with an extruder.
The pressure test of the channel between beads is the greatest advantage of the hot wedge and at the same time the step that is most often neglected. Document each run with a photo of the pressure gauge at the beginning and end of the test, note on the site plan which run corresponds to which test, and file it. This traceability is what differentiates a project accepted without reservations from one with problems at final acceptance.
Do not start welding until the machine has reached a stable operating temperature. The first 10-20 cm of welding are usually out of parameter, and if you integrate them into the work joint, the entire run may fail the pressure test. Always start with an exit section on sacrificial material and then splice with the actual sheet.
800 W or 1800 W for your project?
If you have a pond, landfill, or lagoon project and are unsure which hot wedge variant suits you based on sheet thickness and daily welding volume, ask the virtual assistant. It will calculate the expected productivity for you.
Complementary products
The hot wedge never works alone. It needs the base material, auxiliary machines for details, and quality control tools.
HDPE geomembrane is the base material. The extrusion welding machine is the essential partner for solving details, corners, and repairs that the wedge cannot perform. The needle pressure gauge is the verification tool: without it, you cannot perform the channel pressure test and lose the main advantage of the hot wedge over any other welding technique.
Maintenance and care
The hot wedge is the most demanding machine in terms of maintenance in the welding kit:
- Daily cleaning of the wedge and rollers: at the end of each day, while still hot, wipe the metal wedge with a cotton cloth to remove melted plastic. When cool, brush the rollers with a bronze brush.
- Roller tightening: weekly check that the pressure between the rollers is calibrated. A machine with loose rollers makes a joint with less adhesion and fails the test.
- Temperature sensors: every 100 hours of use, verify with an independent thermometer that the display reading matches the actual wedge temperature. If they differ by more than 10 °C, call technical service.
- Battery and feed motor: lubricate every 50 hours with lithium grease. A dry motor skips speed and ruins the entire welding day.
- Storage: store it in its original case with the wedge cold and clean. Never lying down with the wedge resting on the ground.
Frequently asked questions
What productivity can I expect?
Under normal conditions, the 1800 W variant welds between 700 and 1000 linear meters of joint per 8-hour shift, including calibrations, stops, and pressure tests. The 800 W variant produces around 400-600 linear meters per shift. Higher productivities are possible with two machines working in parallel and a team of four operators.
Why does my weld fail the pressure test?
Common causes are: contamination of the overlap (dust, moisture), insufficient temperature (the wedge does not melt the sheet well), excessive speed (not enough time to melt), wrinkles in the sheet before entering the rollers. Before assuming a material defect, repeat the test with a clean joint and recalibrated machine.
What do I do if I discover a leak in a joint welded days ago?
Locate the exact point of the leak (by delimiting the channel with movable plugs until the area losing pressure is detected). Mark with a permanent marker and repair with an extruder: clean, grind, and weld a bead over the defective joint. After cooling, re-test under pressure. The extruder is always ready to correct what the wedge leaves imperfect.