

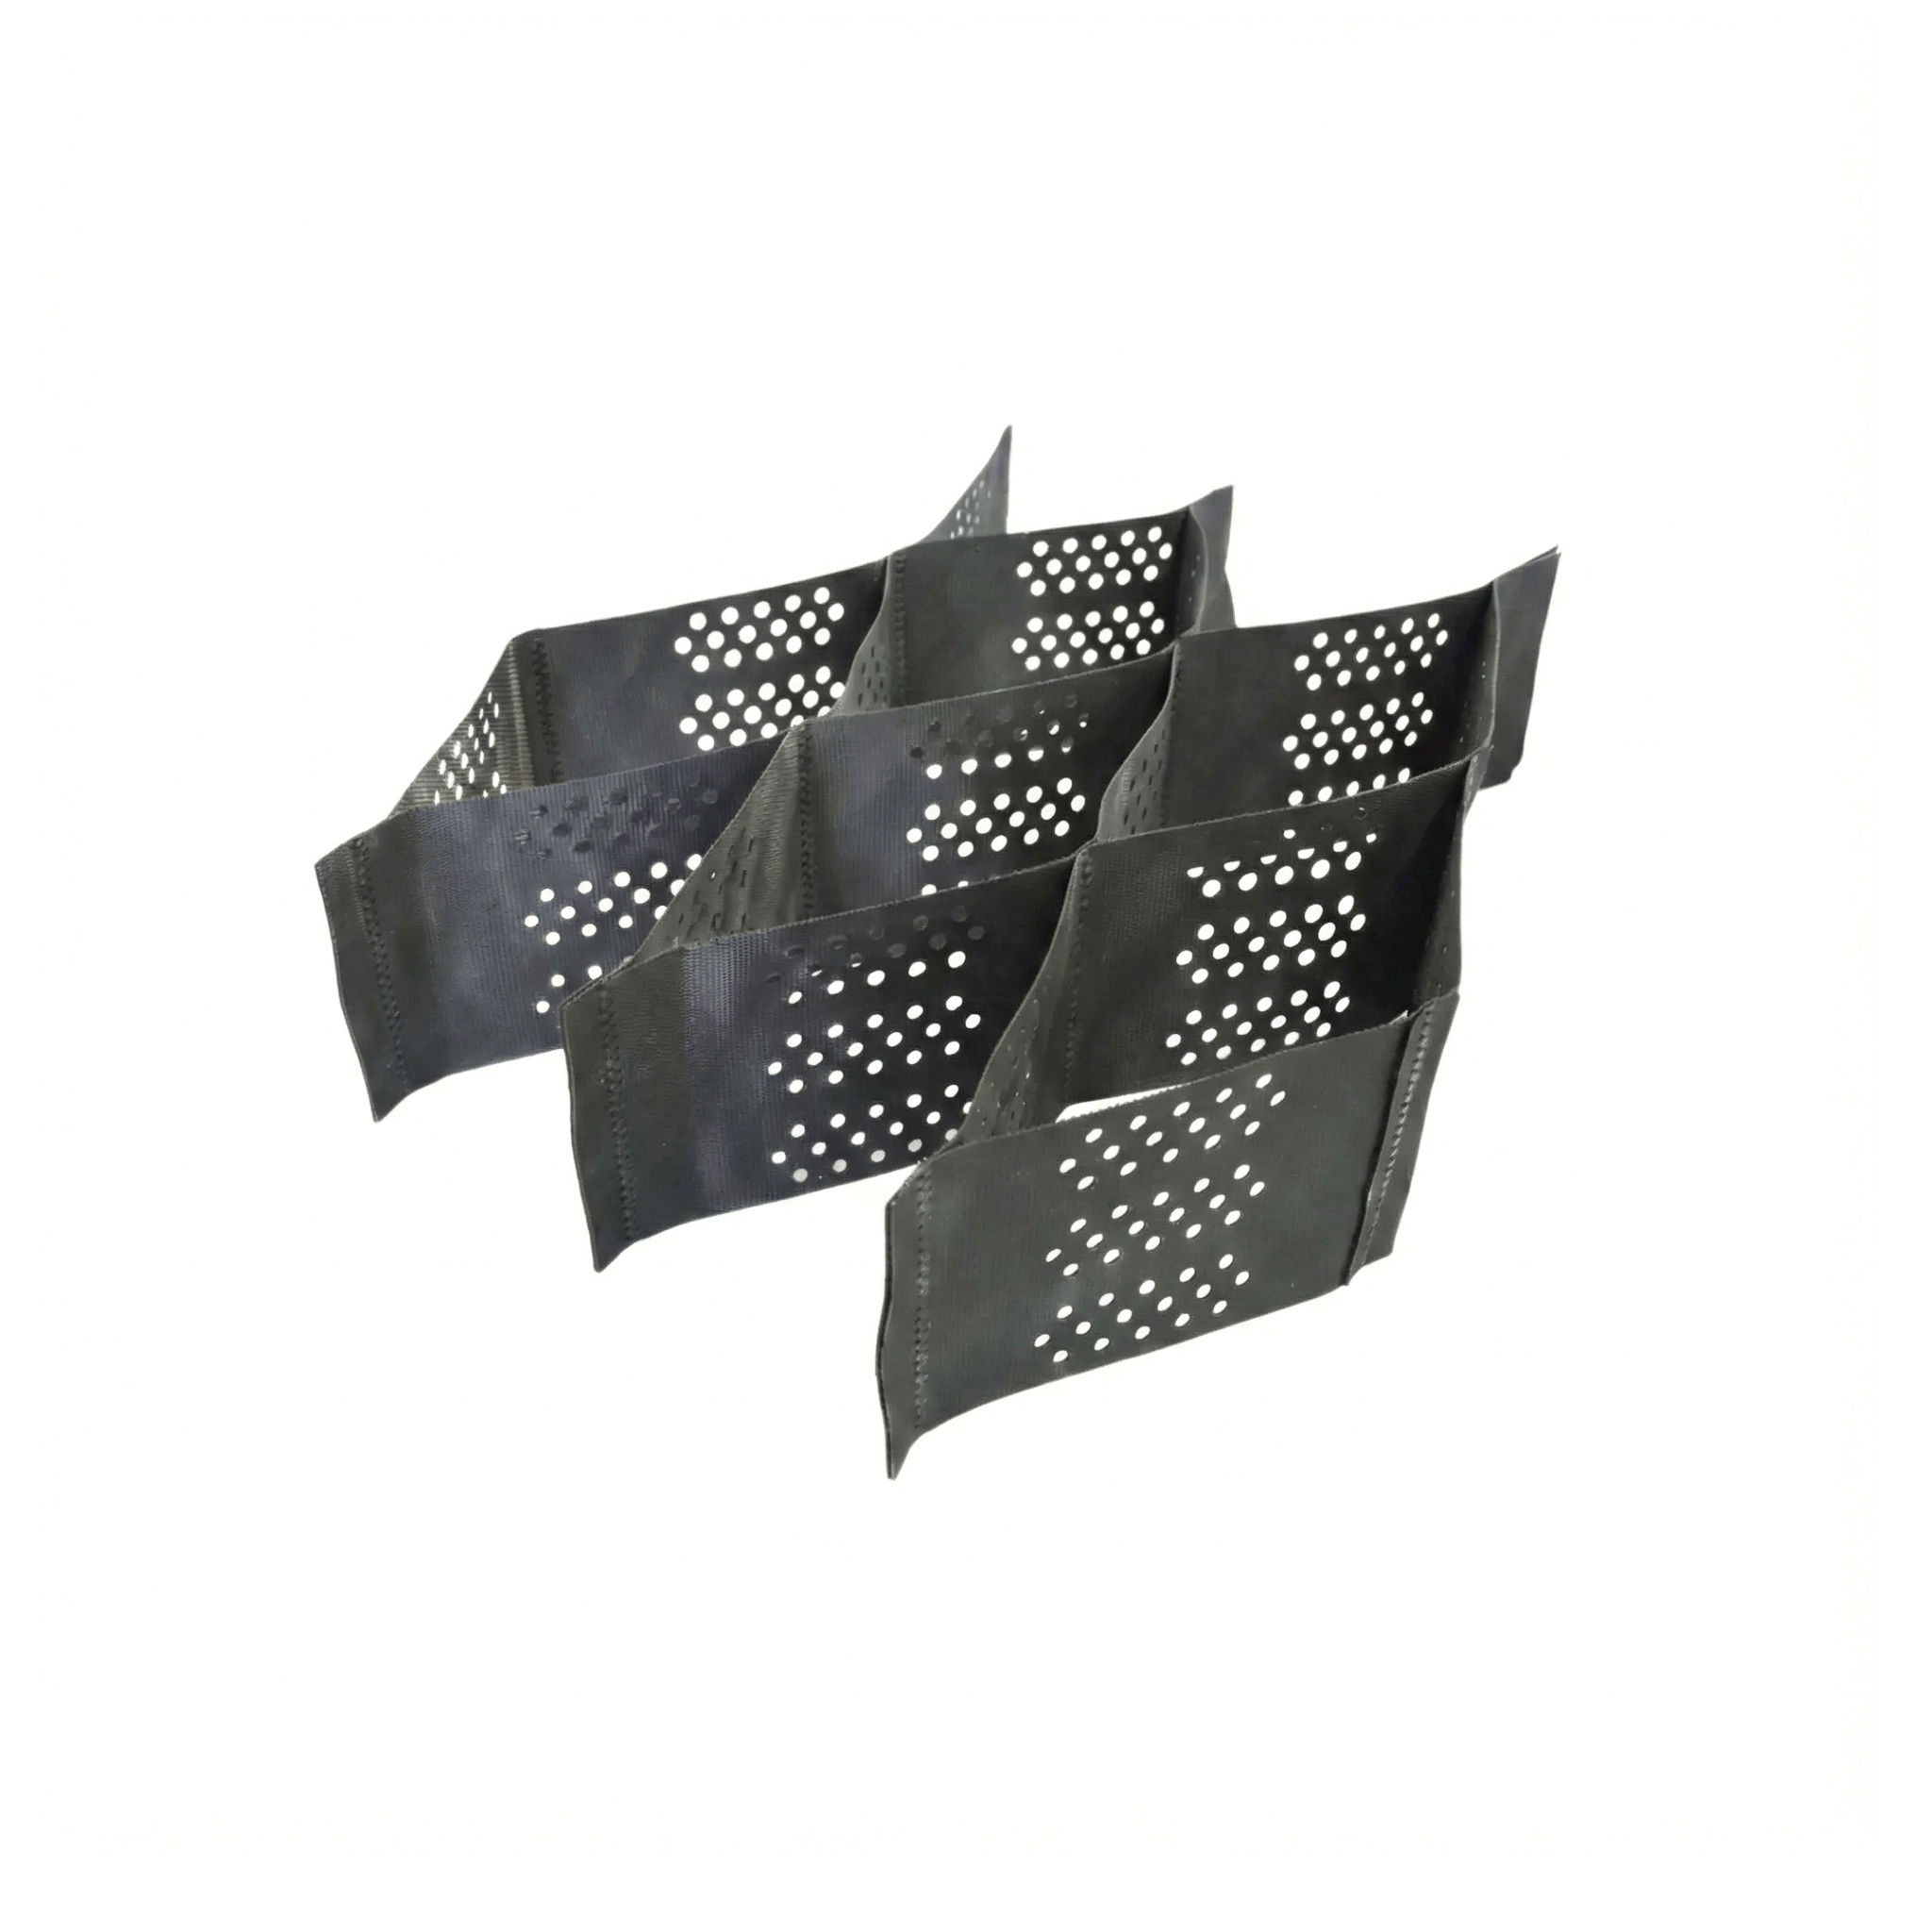
This guide covers the installation of the polyethylene (PE) geocell: excavation and leveling of the subgrade, placement of separation geotextile, spreading of the panels, perimeter anchoring, joining between panels, filling of the cells, compaction and surface finishing. Follow these steps to confine gravel, soil or concrete into stable structures: pavements, slope stabilization or channel protection.
Product specifications
The polyethylene geocell is a three-dimensional panel of welded strips that, when expanded, forms a honeycomb-type cell structure. That geometry confines the fill aggregate and prevents it from migrating laterally under load. The Dodom range offers two heights that change the load-bearing capacity: the 10 cm one for pedestrian and light vehicular loads, and the 15 cm one for commercial loads and heavy vehicles.
| Specification | Height 10 cm | Height 15 cm |
|---|---|---|
| SKU | 671265 | 747867 |
| Material | Polyethylene (PE) | Polyethylene (PE) |
| Finish | Textured and perforated | Textured and perforated |
| Cell height | 10 cm (4 in) | 15 cm (6 in) |
| Weld spacing | 44.5 cm | 44.5 cm |
| Expanded panel | 4 × 6 m (13 × 16 ft) | 4 × 6 m (13 × 16 ft) |
| Coverage per panel | 24 m² (258 ft²) | 24 m² (258 ft²) |
Step-by-step guide to using it
The geocell works by confinement: each cell keeps the aggregate in place under load. If the base is not well prepared, if the panels are not anchored or if the cells are not filled completely, confinement fails. Follow the steps in this strict order.
Excavate and level the subgrade
Remove vegetation and soft soil until you reach firm ground. Level the surface with a minimum slope of 1% to 2% for drainage and compact it. The excavation depth depends on the cell height chosen and on whether you are going to place a gravel drainage layer underneath.
- If you have the 10 cm variant: excavate to 15 cm (6 in) deep to house the geocell plus a thin top fill layer.
- If you have the 15 cm variant: excavate to 25 cm (10 in) deep and include a 10 cm (4 in) gravel drainage layer under the geocell. Heavy vehicular loads require active drainage.
Place the separation geotextile
Over the subgrade place non-woven geotextile to separate the natural soil from the fill. This prevents the subsoil mud from migrating into the gravel and ruining the confinement system. Overlap the rolls 30 cm (12 in) at each joint.
Spread the geocell panels
Open each panel from the center toward the edges until it reaches the expanded dimensions indicated (4 × 6 m). Keep the panels slightly apart from each other to check that the cells are open and straight, without folds or creases.
Anchor the perimeter to the ground
Drive a metal rod with an anchor cap into the perimeter of each panel every 1 m (3.3 ft) and at each corner. The anchoring prevents the panel from closing during filling and keeps the cells open in their designed square shape.
Join the panels to each other
Bring the neighboring panels together until the side walls match and join them with a plastic geocell connector every 30 cm (12 in) along the joint. The joint must be continuous: if a gap is left between panels, the load will open that point before any other.
Fill the cells
Dump the fill material with a loader bucket or loader directly onto the cells, without piling it on top. Spread with a rake until each cell is full and slightly raised above the top edge of the cell, so that after compaction it is flush.
- If you have the 10 cm variant: fill with 10 to 20 mm (3/8 to 3/4 in) gravel, coarse sand or topsoil mixed with gravel if you are going to plant grass (green parking).
- If you have the 15 cm variant: use angular gravel of 20 to 40 mm (3/4 to 1 1/2 in) for heavy vehicular traffic. Round gravel shifts under load and reduces the load-bearing capacity.
Compact the fill
Pass a light vibratory compactor (jumping jack or vibratory plate) over the entire surface. Compact until the material is level with the top edge of the cell. If it drops below the edge, add more fill and compact again.
Apply the surface finish
Add a thin layer of 1 to 2 cm (0.4 to 0.8 in) of gravel of the same size or, if you are going to plant grass, spread topsoil mixed with seeds and water it. This closing layer covers the geocell fiber and leaves a uniform surface for traffic.
For residential parking areas with a green aesthetic, mix the fill in a proportion of 70% 10 mm gravel and 30% topsoil with bermuda grass seed. The gravel provides load-bearing capacity while the soil feeds the grass. The result is a parking area that holds the car but looks like a garden.
Do not fill the geocell before anchoring it and connecting it to its neighboring panels. The weight of the aggregate closes the cells inward and leaves slanted walls instead of square ones. A poorly expanded geocell loses more than 50% of its confinement capacity. Anchoring and connections first, filling afterward. No exceptions.
Complementary products
The geocell does not work without three critical elements: anchoring to the ground, connectors between panels and a suitable granular fill. The following complementary products cover the first two fronts and are the ones you will need regardless of the cell height chosen.
The 50 cm (20 in) metal rod is the standard anchor at the perimeter of each panel. The anchor cap distributes the pressure over the cell wall and prevents the rod from tearing the polyethylene over time. The geocell connector joins the panels to each other so that the mechanical confinement is continuous from one end to the other of the stabilized area; per project you will need between 10 and 12 connectors for each joint between neighboring panels.
Maintenance and care
The geocell is a buried product that is practically invisible once the installation is finished. Its maintenance focuses on protecting the surface fill and addressing minor settlements:
- Inspection every 6 months: check whether there are cells that have dropped below the surface level. If you find any, fill with material of the same size and compact the area spot-wise.
- Fill top-up after heavy rains: if water washes away part of the visible surface fill, replace the lost amount as soon as possible. A partially empty cell confines less and the next rain will wash away more.
- No heavy machinery on green parking areas: if you installed the 10 cm variant for residential use, prevent trucks of more than 3.5 t from circulating. The height is dimensioned for cars, not for commercial traffic.
- Periodic watering if you planted grass: in green parking areas the grass needs weekly watering in the dry season to maintain coverage. If the grass disappears, only exposed gravel remains and the intended aesthetic effect is lost.
- Storage of leftover panels: keep them closed (unopened) in a dry place and protected from the sun. UV-treated polyethylene is resistant, but unnecessary exposure reduces the service life before installing them.
Frequently asked questions
What is the real difference between the 10 cm geocell and the 15 cm one?
The load-bearing capacity. The 10 cm one is dimensioned for pedestrian traffic, residential accesses and light vehicles (cars and family SUVs). The 15 cm one is for commercial parking areas, service roads and heavy vehicles (trucks, forklifts). If you have doubts and cost is not a critical issue, install the 15 cm one: it never falls short of capacity.
What can I fill the cells with?
The most common is angular gravel of 10 to 40 mm depending on the height. Coarse sand, recycled aggregate and a mixture of topsoil with gravel are also admitted if you are going to plant grass. What does not work is fill with fine particles (pure fine sand, clay) because they migrate out of the cells with the water and leave the system empty.
Can I use the geocell for vertical retaining walls?
Yes, but the design changes. In walls, horizontal layers of geocell filled with confined soil are stacked, forming structural blocks. That application requires a stability calculation and, normally, uniaxial geogrid between layers. If your project is a wall, before buying consult the virtual assistant about the total thickness and height to dimension the system properly.
